Using the POS Page
Point of Sale

Last Sale
Check Out
| 1 | If the "See how the new POS works" link is visible, it can be clicked to start the brief tour of the POS page. |
| 2 | Click Clear to remove the transaction member, all items in the cart, and any associated employees. |
| 3 | Click Options to view the POS Options menu. Receipts and gift card options are available in this menu. |
| 4 | Click the information icon to view the member's event summary. |
| 5 | Click the loupe icon to search for and add a member to the sale. When a member has been added, you can click the member's name to open the member dashboard, or click "X" to remove the member from the transaction. |
| 6 | Click the drop-down icon next to the member's name to view member details. |
| 7 | Click Load Previous Sale to open the Find Receipt dialog. |
| 8 | Click the drop-down icon in the Sale tile to show sale options (apply a discount, add a comment, or waive tax on this sale). |
| 9 | Select the POS item category to display. |
| 10 | Search for an item by name or UPC. |
| 11 | Filter the displayed items by product, service, or both (All). |
| 12 | Click an item to add it to the cart. |
| 13 | If the quantity drop-down menu is active, you can change the quantity of this item. |
| 14 | Click a unit price or extended price to open the Prompt for Price dialog, in which you can select a reason code and update the price for the item for this transaction. |
| 15 | If discounts are allowed for the item, click None or the discount name to open the Select Item Discount dialog and remove or apply a discount. |
| 16 | Select Waive Tax to apply a reason code and waive the tax amount for this item for this transaction. |
| 17 | If an item has an expiration date, it will appear here. Click Remove to remove it. |
| 18 | Remove this item from the cart. |
| 19 | Click None or the employee's name next to a service in the cart to add or remove the employee from the event to be scheduled. |
| 20 | If the calendar icon appears in the Expiration column, you can select or update the expiration date. Click Remove to remove it. |
| 21 | The extended price is the dollar sum for all items in the cart, prior to discounts and tax. |
| 22 | This is the full dollar amount to be discounted for this transaction. |
| 23 | This is the full dollar amount for taxes to be applied for this transaction. |
| 24 | The Total is the sum of the extended price and all the discounted amount. The Grand Total is the sum of the total and the tax amount. |
| 25 | Click the grand total amount to view a table of all items, their prices and tax amounts, and any price alterations for this transaction. |
| 26 | See Make a Return. |
| 27 | Open the Drop/Add dialog to drop cash (or another payment method) or to add cash (or another payment method) to the cash drawer. |
| 28 | Click Quick Cash to open a menu from which you can select whole dollar amounts, or enter an exact change amount. The transaction will be completed as a cash sale. |
| 29 | If the member has a saved Card on File, click this button to select that card as the payment method for this transaction. |
| 30 | Click Checkout to proceed to the check out. |
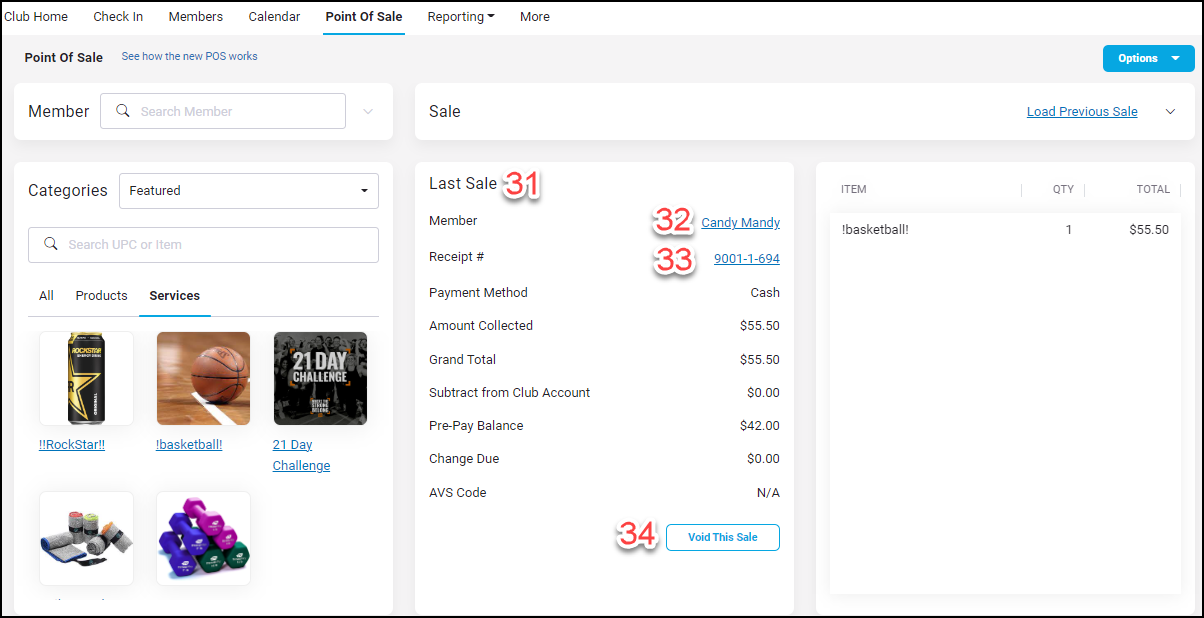
| 31 | Once a sale has been completed, the details will be displayed in the Last Sale tile. |
| 32 | Click the member's name in the Last Sale tile to start a new transaction with this member. |
| 33 | View the receipt for this transaction and email it to the member if needed. |
| 34 | Click Void This Sale to void the transaction. Select a reason code, add a comment if needed, and click Finish. |
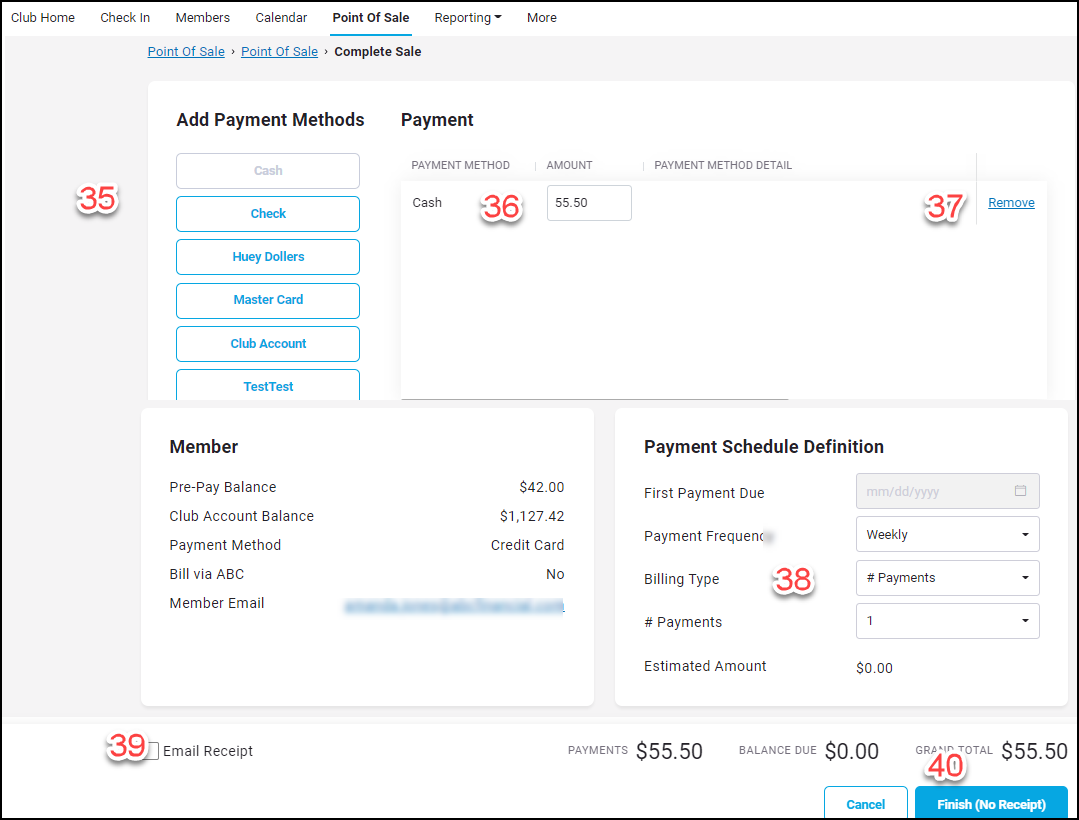
| 35 | Select the payment method for the transaction. |
| 36 | Change the payment amount, if needed. |
| 37 | Click Remove to remove the item from the cart. |
| 38 | In the payment schedule definition tile, you can set up a payment schedule with this member for the transaction. To set up a payment schedule, enter the first payment due date, the payment frequency, and billing type (number of payments or estimated amount). If you selected "number of payments," enter the number of payments to be collected. If you selected "estimated amount," enter the payment amount. |
| 39 | Select Email Receipt to send the receipt to the member's saved email address. |
| 40 | Click Finish to complete the transaction, or click Cancel to return to the Point of Sale screen. |