Workstation Checklist
We are excited to upgrade your club to the new interface and functionality of ABC Ignite. Please review the instructions below to ensure your workstations are ready for the big day!
Updating your stations using the instructions below will:
- Ensure your stations are utilizing the appropriate internet browser
- Ensure you have the latest version of ABC software packages
- Ensure your computers are up to date with Microsoft software
- Ensure security updates are complete
Completing this checklist for ALL WORKSTATIONS will ensure that any hardware attached to these stations continues to function as designed beyond your upgrade.
Please reach out to Technical Support to resolve any preexisting technical issues about any of your stations or hardware attached.
- System Requirements
- Background Checkin
- Update Membership and Operations Links
- Set the Browser to Automatically Clear the Cache
- Uninstall/Repair AutoUpdater
- Set Adobe Acrobat Reader Preferences
- Verify Verifone USB Driver Installation Date
- Verify EMV Software Version
System Requirements
See this page for current system requirements.
Windows 7 is not supported for the Ignite suite. If you currently have any computers running Windows 7 or have any questions on the system requirements above, please contact your CSM to discuss.
To ensure your computer meets these requirements, you'll need to check your installed hardware, operating system and version. Follow the steps below to check your specifications.
-
Press the Windows key on your keyboard and type “This PC."
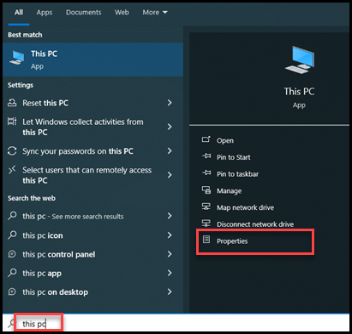
- Click Properties.
-
In the screen that pops up you will see a list of information. The CPU, RAM and Windows Version are highlighted below. Compare this information to the System Requirements table above.
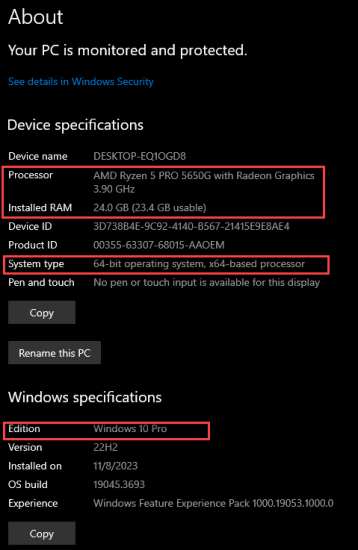
-
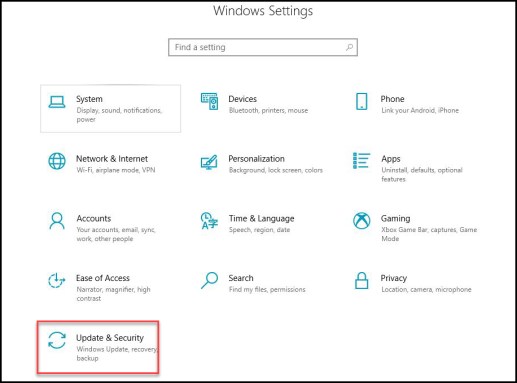
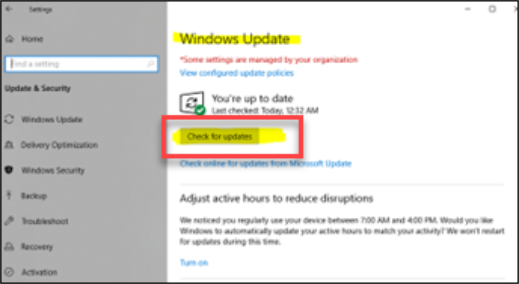
To ensure that Windows updates are current, navigate to Start>Settings>Update&Security>Windows Update>Check for updates.
- Ensure your Edge/Chrome version is current.
- In Edge, navigate to Main Menu>Help and Feedback>About Microsoft Edge. Edge will check for updates and update automatically.
- In Chrome, navigate to Main Menu>Help>About Google Chrome>Update Google Chrome. Chrome will check for updates and update automatically.
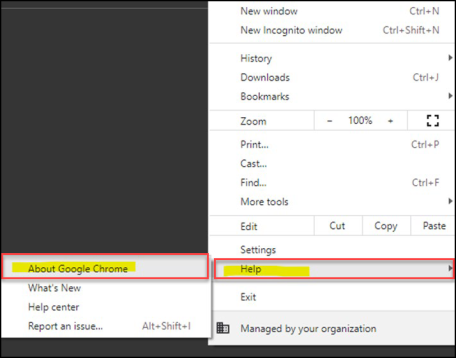
If you don't see this button, you are not using the latest version. Click Relaunch.
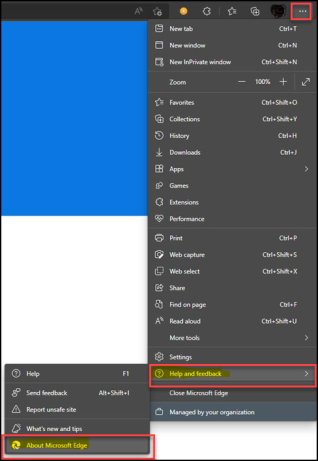
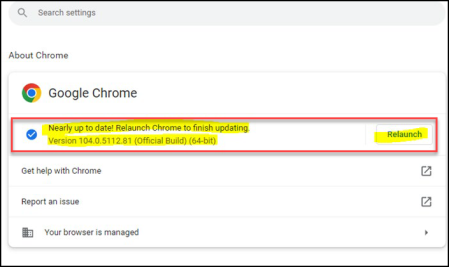
- In Edge, navigate to Main Menu>Help and Feedback>About Microsoft Edge. Edge will check for updates and update automatically.
- Check your screen resolution. Instructions vary depending on equipment.
- Ensure all hardware is working correctly.
- Ensure you have the latest versions of Hardware Services and AutoUpdater.
If this workstation is using Chrome or Edge, the Hardware Services and AutoUpdater versions are already current. If the workstation uses Internet Explorer or is a "DataTrak-only" workstation, follow these steps.- Click the File Explorer icon.
- Navigate to
C:\Program Files\ABC Financial\Updater\InstallScripts. - See Workstation Upgrade for the current Hardware Services and AutoUpdater versions and compare them to your version.
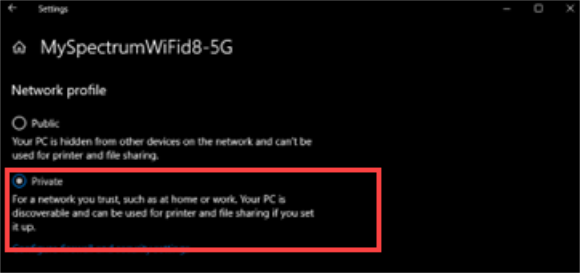
- Ensure that your network is set to Private and not Public.
- On the right side of the taskbar, select the Wi-Fi Network Icon under the name of the Wi-Fi network to which you're connected.
- Click Properties, then select Private.
Background Check In
To use background check in, a barcode scanner with a serial connection is required. Make sure the scanner connects to the computer with a cable like the one pictured below.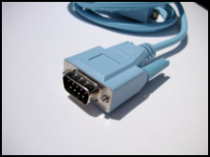
With Background Check In, members can check in if the computer is connected to the internet and Membership and Operations is open to any page or running in the background. This feature applies to attended, unattended, and remote checkins and requires a serial scanner. A serial scanner is required for the new Club Home feature to work. Please see your CSM to place an order if needed.
Update Membership and Operations Links
DataTrak links that open with Internet Explorer can be updated to be opened with Google Chrome by doing the following:
- Right-click the DataTrak link and click Properties.
- Copy only the target URL for the workstation, starting with
"HTTPS." DO NOT COPY the Internet Explorer target.
For example, from the following text, you would copy only the highlighted portion:
"C:\Program Files (x86)\Internet Explorer\iexplore.exe" https://prod02.abcfinancial.com/login.html?workstationId=2d068b59555b4bf99e916b33bd35e598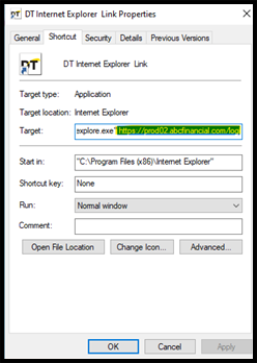
-
Right-click on the Desktop and select New>Shortcut.
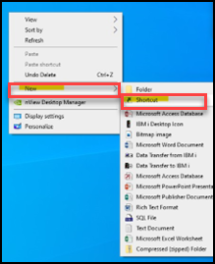
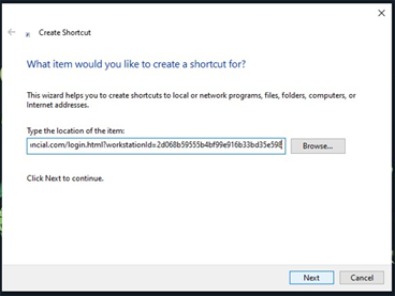
- Paste the URL you copied from Step 2 onto the “Type the Location of the Item” field and select “Next.”
-
Name the new shortcut with the club number included. Ex: "DataTrak 9003" or "9003 DT."
The new link will automatically open on the default browser (Edge/Chrome) on the PC’s default app settings. -
To change the link icon, right-click on the new link and select Properties>Change icon. Locate the icon you want to use in
C:/ABC Files.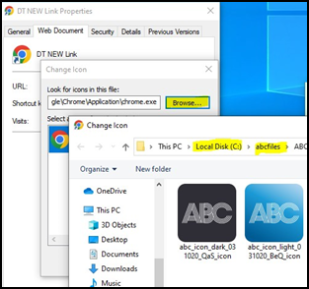
-
If your new link continues to open on Internet Explorer after all the steps above have been completed, you may need to change the default browser to Edge or Chrome.
- Press the Windows key and type “Default Apps.”
- Select either Microsoft Edge or Google Chrome and click Set default.
Links will now open with your selected browser.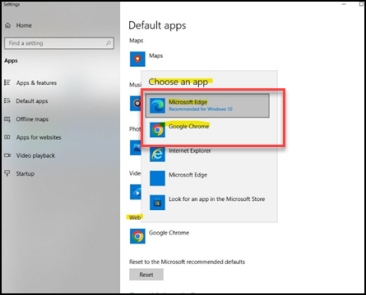
Set the Browser to Automatically Clear the Cache
To set the browser to clear the cache automatically, refer to the directions below.
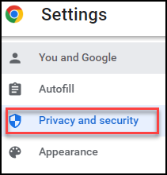
Chrome
To set the Chrome browser to clear the cache automatically:
- Open Google Chrome.
- Click the main menu in the top right corner of the browser window.
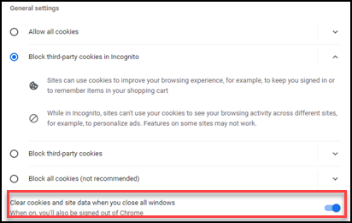
- Navigate to Settings>Privacy and Security>Cookies and other site data.
- Turn on the Clear cookies and site data when you quit Chrome setting.
- Close the Chrome window.
Microsoft Edge
To set the Edge browser to clear the cache automatically:
- Open Microsoft Edge.
- Click the main menu in the top right corner of the browser window.
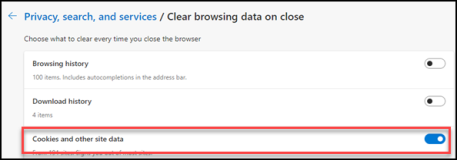
- Navigate to Settings>Privacy, search, and services>Clear browsing data.
- Turn on the Choose what to clear every time you close the browser setting.
- Turn on the Cookies and other site data setting.
- Close the Edge window.

Uninstall/Repair the AutoUpdater
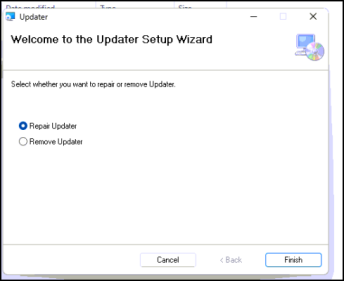
To uninstall or repair the Autoupdater:
-
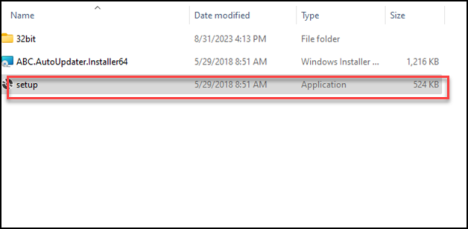
Click the File Explorer icon and navigate to
C:/ABC Files. - Open the AutoUpdater folder and click setup.
- Select Repair Updater or Remove Updater and click Finish.
Set Adobe Acrobat Reader Preferences
To set preferences for Adobe Acrobat Reader:
-
Click the Adobe Acrobat Reader icon
 in the taskbar.
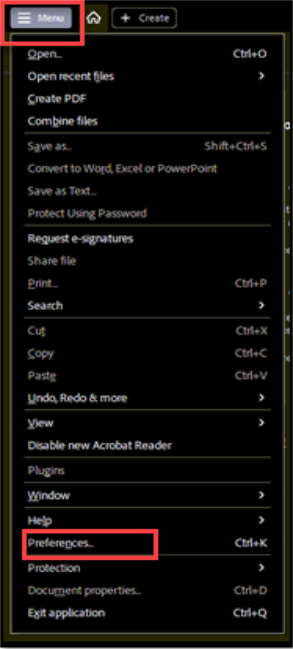
- Click the Menu at the top left and select Preferences.
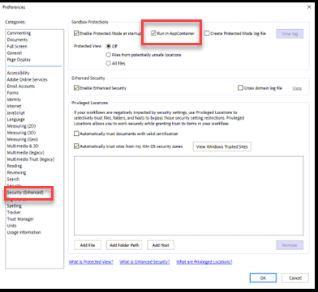
- Select the Security (enhanced) tab to the left and uncheck Run in AppContainer.
- Click Yes when prompted.
- Uncheck Enable Protected Mode at Startup.
- Click Yes when prompted.
- Uncheck Enable Enhanced Security.
- Click OK.
- Press the Windows key and type “Default Apps.”
- At the bottom of the Default apps page, click Set defaults by app.
- Select Adobe Acrobat.
- Click .pdf.
- Select Adobe Acrobat.
PDFs will now open in Adobe Acrobat Reader.
Verify Verifone USB Driver Installation Date
To verify the installation date of the Verifone USB driver:
-
Hold the Windows key and press "R" to open the Run dialog.
-
Type
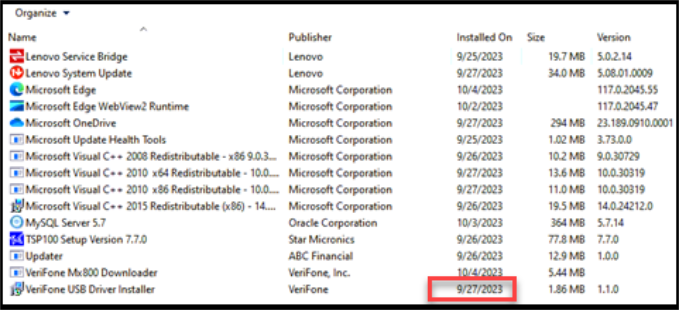
appwiz.cpland press OK. - Scroll down to the “Verifone USB Driver Installer and verify the date the driver was installed.
Verify EMV Software Version
To verify the EMV software version:
- Press the Windows key.
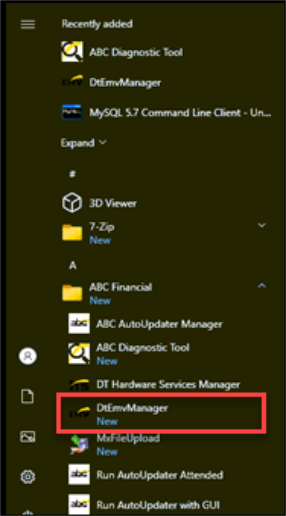
- Scroll to and expand the
ABC Financialfolder. - Select
DTEmvManager. - Select More.
- Click Run as Administrator.
- When the UAC prompt appears, click Yes.
- Click Yes.
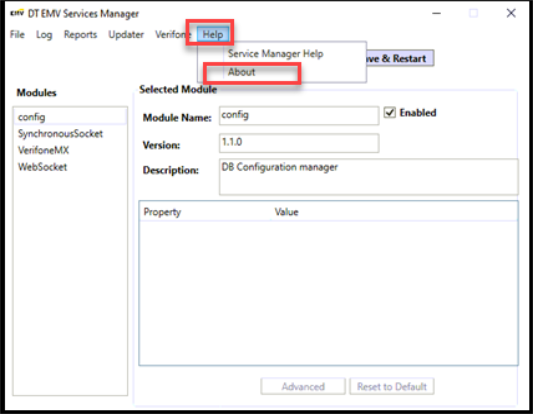
- In the DT EMV Services Manager, click Help and select About.
- Ensure the version is 1.2.7 or later.
- Click Close.
- Close the DT EMV Services Manager.
